Safety Glasses
 Nitrile Gloves
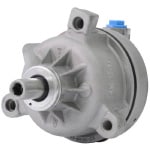 Power Steering Pump
 Power Steering Hoses (Optional)
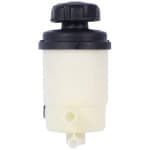 Power Steering Remote Reservoir (Optional)
 Power Steering Fluid
 Pulley Puller and Installer Kit (Optional)
 Jack
Jack
 Jack Stands
 Drain Pan
 Shop Rags
After checking your service manual for maintenance intervals and replacement procedures specific to your vehicle, follow these helpful instructions to successfully replace your power steering pump.
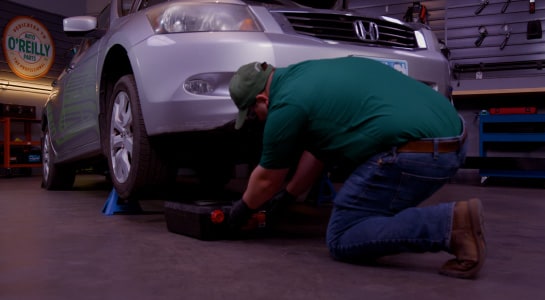
Step 1: Prepare Your Vehicle
Set a catch basin under the vehicle to collect any spilled fluid. Per manufacturer’s recommendations, it’s best to complete a power steering fluid flush before installing new components to prevent any contaminants from entering and damaging the new pump. You can learn more about how to flush the power steering system with this helpful video.
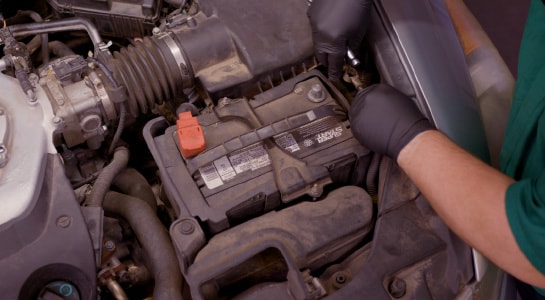
Step 2: Disconnect the Battery
Disconnect and isolate the negative battery cable.
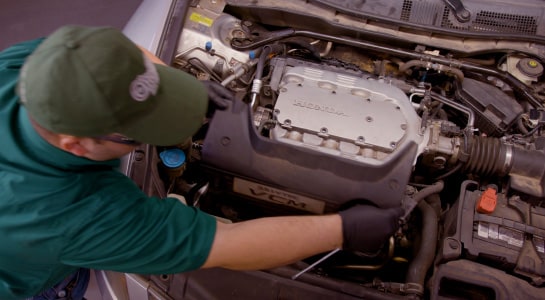
Step 3: Locate Your Power Steering Pump
Locate your power steering pump. You may need to remove components to give yourself access to the pump on your specific vehicle.
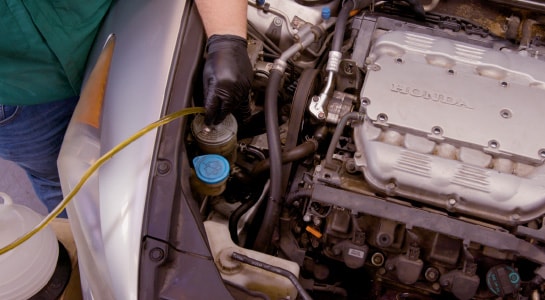
Step 4: Siphon the Power Steering Fluid
Siphon out as much power steering fluid as possible. At this point, you should also inspect your reservoir, if possible, for signs of contamination. Remote reservoirs should typically be replaced at the same time as the power steering pump.
Step 5: Remove the Serpentine Belt
Before removing your serpentine belt, locate a diagram of the belt’s routing. You can usually find a diagram in your owners manual or on a sticker somewhere in the engine compartment.
Use a socket and ratchet or breaker bar to rotate the belt tensioner until it reaches its stop. Slip the belt off then slowly let the tensioner rotate back until it stops. Be sure not to let the tensioner arm snap back into position.

Step 6: Cover AC Compressor and Nearby Components With a Shop Towel
Cover the tensioner, alternator, and A/C compressor with shop towels or rags to protect them from spilled power steering fluid when you remove the pump.
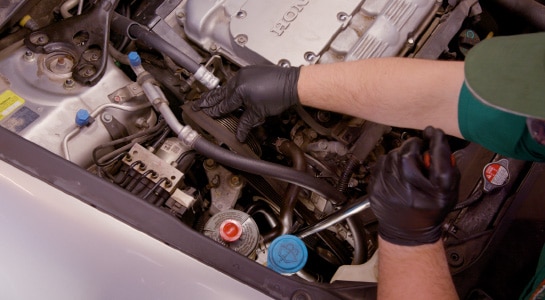
Step 7: Remove the Hoses
At the pump, remove the high-pressure hose and the return hose.

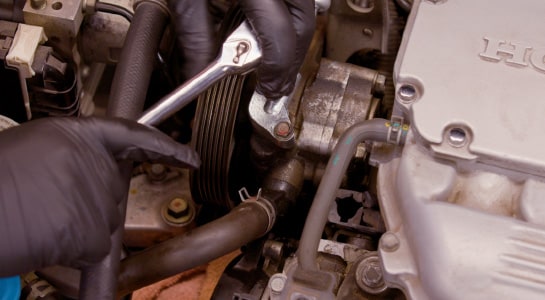
Step 8: Remove the Power Steering Pump
Use a ratchet and socket with an extension to remove the bolts securing the pump to the engine and carefully remove the pump, being sure not to spill any fluid on the vehicle. If you do, wipe up any spilled fluid as quickly as possible.

Step 9: Inspect and Remove the Old Pulley
If your new power steering pump didn’t come equipped with a new pulley, inspect the old pulley for signs of damage. If it looks good, you’ll need to remove the pulley from the old pump and install it on the new one. This may be as simple as removing a nut or bolt to remove the old pulley, or may require a pulley puller and installer kit. You can find this kit in our Loaner Tool program, and can learn more about how to use a pulley puller and installer kit with our helpful video.

Step 10: Reinstall the Pulley
Reinstall the pulley and nut on the new power steering pump, use your pry bar to brace the pulley against the pump body, and tighten the nut. For our Accord, we torqued the nut to 47 foot-lbs. If your new pump doesn’t include the inlet tube or other hardware, you’ll need to move it over as well before installing. Make sure to use new O-rings where necessary to prevent leaks.

Step 11: Install the New Pump
Move the new pump into place and secure it with the bolts you removed. Torque those bolts to your vehicle manufacturer’s specification.

Step 12: Replace Power Steering Hoses
When replacing your power steering pump, it’s often a good idea to replace your power steering hoses also, since they can deteriorate internally. These rubber particles can cause damage to the new pump, so replacing the hoses at the same time can help ensure a long-lasting repair. For more information on how to replace power steering hoses, check out our video.

Step 13: Replace the O-Ring
Replace the outlet hose O-ring and reinstall the power steering hoses. Tighten them to specification.

Step 14: Remove the Rags
Remove the rags from the engine compartment and dispose of them properly.

Step 15: Reinstall the Belt
Use the diagram you found earlier to route the belt back onto the pulleys. Start by routing the belt around all the pulleys except the idler pulley. Rotate the tensioner arm until it contacts its stop position. Route the belt around the idler pulley and slowly let the tensioner rotate into the belt. Make sure the belt is routed properly, and that it’s seated on all the pulleys.

Step 16: Inspect the Belt
With the belt installed, it may be a good idea to inspect it with a belt wear indicator to make sure the gap between the tang and the housing stop doesn’t exceed manufacturer specifications.

Step 17: Reinstall Components
Reinstall any components you removed in order to gain access to the power steering pump.

Step 18: Reattach the Battery Cable
Reattach your negative battery cable, and remove the catch basin from under the vehicle.

Step 19: Bleed Your Power Steering System
Now you’ll want to bleed the power steering system, and there may be a specific procedure for your vehicle, but most are relatively similar. Bleeding the power steering system, especially newer vehicles, is best completed using a vacuum pump to remove air from the system before running the vehicle, especially on newer vehicles. Learn more with step-by-step instructions on how to bleed the power steering system.

Step 20: Check Fluid Level
Once the system is bled, check to make sure your power steering fluid level is appropriate, and start the vehicle. Check for any leaks and ensure your power steering system is working as it should. It’s usually best to check the fluid level a few times to ensure it remains consistent. If it has, close the hood.