
 Safety Glasses
 Nitrile Gloves
 Jack Stands
 Floor Jack
 Wheel Chocks
 Drain Pan
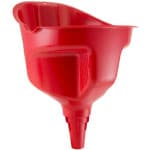 Oil Funnel
 Torque Wrench
 SYNTEC High Mileage
 MicroGard Select Oil Filter
 Dorman Drain Plug Gasket
 Ratchet and Socket Set
 Oil Filter Wrench
 Shop Towels
We will be changing the engine oil and filter in a 2017 Toyota RAV4 hybrid. Procedures will be similar for most RAV4 hybrid models from 2013 to 2018, but be sure to know the specifics for your vehicle before getting started.

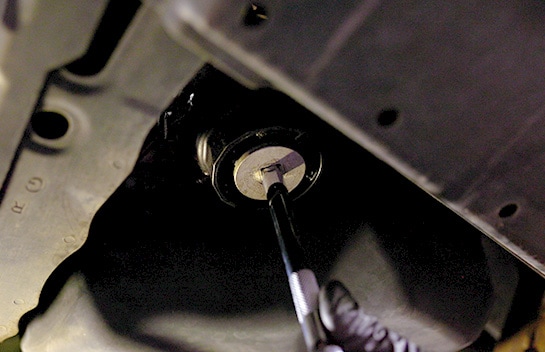
Step 1: Drain the Old Oil

|
Do It Right: Learn how to safely lift your vehicle with this How-To page: How to Safely Jack Up Your Vehicle |

Remove it by hand, and let the oil drain completely.
|
Do It Right: You can also remove the oil fill cap on the engine to allow the oil to drain more quickly. |

Step 2: Remove the Old Filter

You can fit a 15mm hose to the drain tube before you attach it to the filter housing, or set your drain pan under the filter when you attach the tube.


Step 3: Remove Your Old Oil Filter


Step 4: Install the New Oil Filter


Step 5: Reinstall Your Oil Drain Plug
Use your torque wrench and 14mm socket to tighten the plug to 30 foot-pounds.

Step 6: Refill Your Engine’s Oil and Check for Leaks
This model takes 4.6 quarts of 0W-20, and since this vehicle has over 75,000 miles, we’re using Syntec full synthetic high-mileage. Once the oil level is refilled, tighten the fill cap back in place and run the engine until it’s warm.


Step 7: Lower Your Vehicle

Step 8: Check Your Oil Level
Once you’ve verified the oil level, you can shut the hood.
Monochrome Display
Turn the engine switch to the LOCK position, or with a smart key, switch the engine OFF.
While pressing the display change button, turn the engine switch to the ON position, but don’t start the engine. Continue to press and hold the button until the trip meter displays zeroes.

Color Display


Regularly changing the oil in your Toyota RAV4 according to the information and recommendations in your owners manual protects your engine from overheating, wear, and decreased performance. Going too long between oil changes can result in a clogged or dirty oil filter or contaminated oil, which can lead to costly repairs, engine damage, or catastrophic engine failure. Following these steps and video instructions can help you complete your oil change in no time to keep your engine performing its best. To learn more about oil changes, choosing the right oil for your vehicle, or synthetic oil vs conventional oil, visit our How-To Hub for all of the guidance and information you need to get the job done right.
The automotive repair work depicted in this series is performed under the direction of the manufacturer of the product featured. Prior to undertaking any of the demonstrated repairs on your vehicle, we suggest you consult with a certified mechanic or another professional who can adequately advise you of the proper repair or remedy required. O’Reilly Automotive Stores, Inc. and its affiliates (“O’Reilly”) disclaims any responsibility for injury or damage resulting from a viewer’s attempt to recreate the repairs shown in this series.