
 Safety Glasses
 Safety Gloves
 Mityvac Plastic Vacuum Pump MV8000
 O’Reilly Brake Fluid
A vacuum bleeder tool, also called a “one-person bleeder,” is helpful because it eliminates the need to have someone else press the brake pedal while you perform a brake bleed procedure. This video details a brake bleed on a 2021 Nissan Rogue Sport S using a MityVac MV8000 vacuum bleeder, but be sure to consult your vehicle’s service manual for exact specifications and brake bleeding requirements. Properly maintaining your brake fluid level and condition not only keeps your braking system working safely, but can also extend the life of hydraulic brake system parts and ensures peak braking performance when it matters most. If you don’t feel comfortable tackling this repair yourself, we can recommend a professional technician in your area to get the job done right.

Step 1: Prepare Your Nissan
Park on a level surface and open the hood.

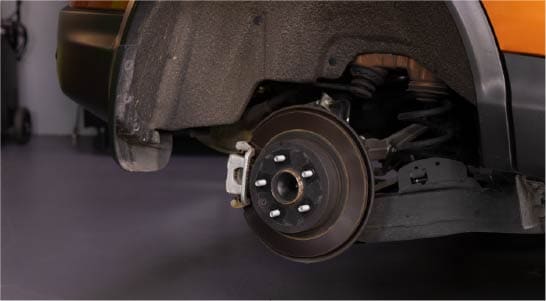
If needed, lift and support your vehicle and remove wheels. Make sure all the bleeder fittings are clean before starting the procedure.
Step 2: Determine Your Starting Place
Bleed your wheel cylinders and calipers starting with the wheel farthest from the master cylinder, and work your way forward. We’ll be starting with the rear passenger wheel in this case.

Step 3: Start Assembling Your Vacuum Bleeder
Start assembling the vacuum bleeder by attaching the 1 ½” piece of tubing between the pump and the lid of the reservoir, at the port marked “to pump”. Attach the 3 ½” hose to the bottom of the cap.
Attach the cap to the reservoir and make sure it is snug, but don’t overtighten it. Attach a length of tubing that’s at least 12” long to the other port on the lid and make sure the lid is snug, but don’t overtighten it.

Step 4: Prepare Your Bleeder Fitting
Now select the appropriate adapter or adapters to fit your bleeder fitting. The L-shaped adapter should fit snugly over the bleed fitting so that it seals properly. The tapered adapters will fit inside the fitting, and should seal when you insert by pressing and twisting.

Step 5: Attach Your Adapter to Your Bleeder Fitting
Once you’ve chosen the appropriate adapter, attach it to the reservoir hose. Place a wrench on your first bleed fitting. Attach the adapter and vacuum pump assembly and pump the handle 10 to 15 times.

Step 6: Drain Your Old Brake Fluid
Use the wrench to open the fitting slightly, typically just ¼ to ½ a turn enough to allow fluid to flow through the hose and into the catch reservoir.
Allow about 2” of fluid into the jar and keep watching the line attached to the bleeder for bubbles. Once there are no more bubbles in the bleeder line, close the fitting.

|
Do It Right: If no fluid is being discharged, make sure the lid is on tight enough to create the necessary vacuum. |

Step 7: Add New Brake Fluid
Refill the master cylinder with the brake fluid specified by your vehicle’s manufacturer. Make sure the master cylinder doesn’t run out of fluid during your bleed procedure, as this can cause air to enter the system and require additional bleeding.

Step 8: Repeat the Process
Repeat these steps for each of the remaining wheels.

Step 9: Reattach Your Nissan’s Wheels
Upon completion, if removing wheels was part of your procedure, you can reinstall them and lower the vehicle.

Double-check to make sure your master cylinder is topped off and close the hood.


