
 Safety Glasses
 Nitrile Gloves
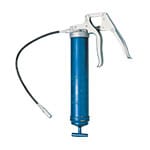 Grease Guns
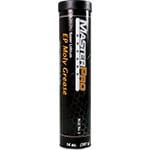 Grease Cartridges
 Grease Containers
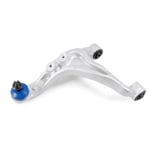 Control Arm and Ball Joint Assemblies
 Shop Towels
Grease guns are essential for vehicle chassis and suspension service, and allow users to easily grease ball joints, tie rods, control arm bushings, and more to extend their life. A grease gun is designed to securely couple with a Zerk fitting on your suspension component to allow grease to pass between the gun and the component. Grease guns must be filled with grease before use, either by loading the grease gun with grease from a container or using a grease cartridge. Setting up and loading your grease gun properly can help ensure a successful suspension service.

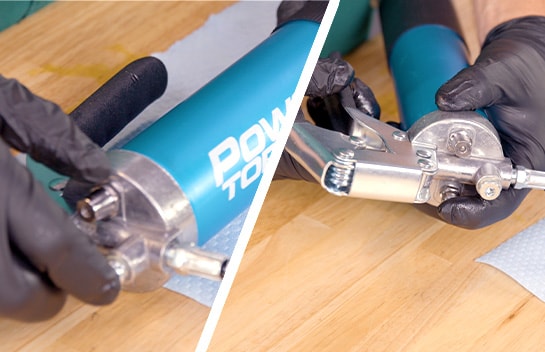
Step 1: Open Your Grease Gun
Start by removing the head of the gun from its barrel.

Pull the Rod all the way out and lock it.

Step 2: Insert Your Grease Cartridge
Take the lid off the grease cartridge. Insert the cartridge into the barrel.
Remove the pull-tab on the cartridge. Make sure the rim of the cartridge is seated firmly against the rim of the cylinder.

Step 3: Reinstall Your Grease Gun Barrel
Reinstall the barrel at the end of the cylinder, but leave it loose. Release the rod by turning it out of its retaining groove.
Step 4: Push Your Grease Gun’s Inner Rod
Push the rod into the cylinder to push air out and force grease into the head of the gun.

Use the handle to prime the pump until grease starts to move through the opening at the end of the hose. Wipe it clean before attaching the coupler.
Step 5: Depress Your Grease Gun Air Bleeder
Tighten the cap and depress the air bleeder to force out any remaining air. If your gun has no air bleeder, leave the cap loose and push the rod handle a few times to prime it before tightening the cap.
Step 6: Attach Coupler to Grease Gun
Attach your coupler or applicator.
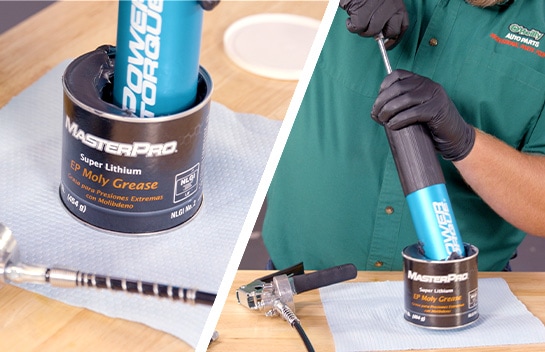
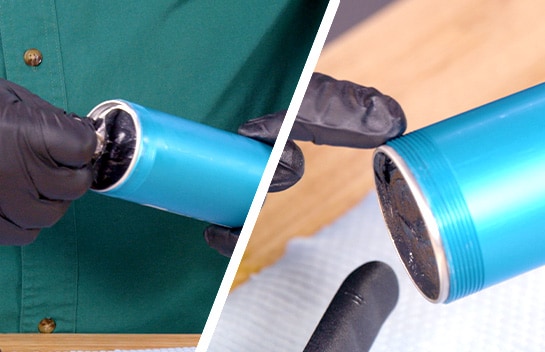
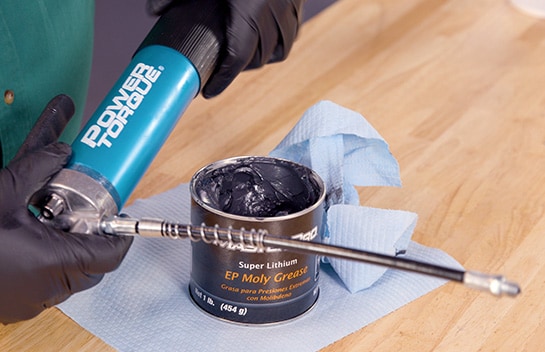
Step 7: Submerge Your Grease Cylinder
If you’re loading a gun from a container of grease, start by removing the head from the cylinder. Lower the cylinder into the container until the end is submerged in grease by about two inches. Hold the cylinder down and pull up on the rod handle.

Step 8: Load Your Grease
Once the rod is fully extended, lock it in place. Move the cylinder from side to side as you lift it out of the grease to remove any excess from the cylinder opening.

Use a shop towel or rag to wipe grease from the outside of the cylinder.
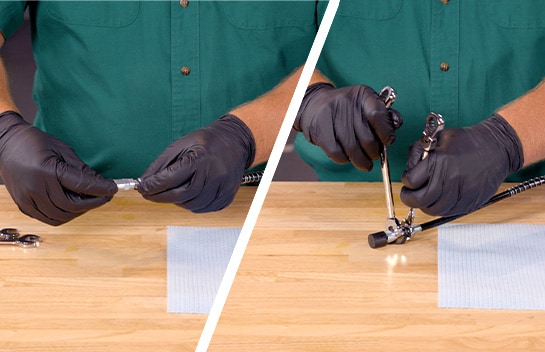
Step 9: Reattach Your Grease Gun Head
Reattach the head to the cylinder and unlock the rod handle.

Step 10: Prime Your Grease Gun
Prime the pump. Wipe down the opening. Attach the coupler. Force out any remaining air. Now, your grease gun is ready to use.

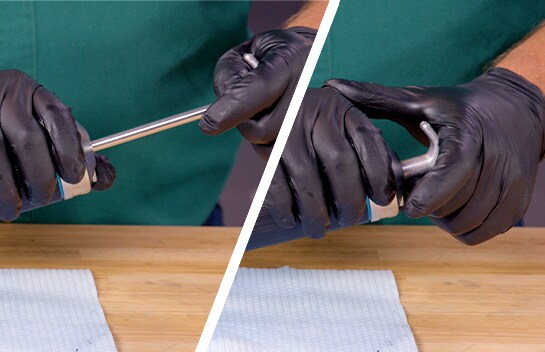
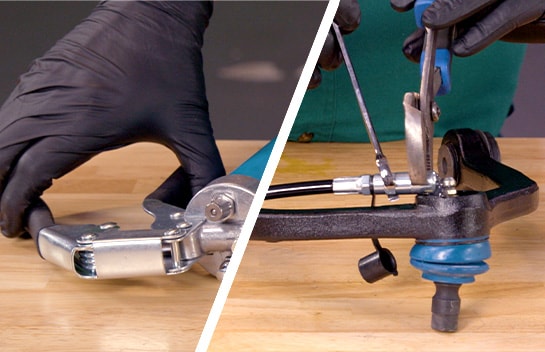
Step 11: Adjust Your Coupler for a Zerk Fitting
Most grease guns are equipped with an adjustable coupler that’s designed to attach to a zerk fitting like the one on this control arm and ball joint assembly. Rotate the coupler counterclockwise to open it up so that it fits easily over the zerk fitting.

Once it’s on the fitting, rotate the tip clockwise to create a sealed coupling.
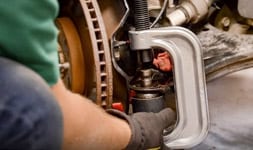
Step 12: Pump Grease into the Zerk Fitting
Use the handle to pump grease into the component. If grease spills out around the fitting, it may mean that the head needs to be tightened further.

Step 13: Remove Coupler from Assembly
Once the desired amount of grease has been pumped in, usually when you start to feel resistance in the grease gun handle, rotate the coupler counterclockwise again to loosen the connection so that it can be removed from the fitting.

The automotive repair work depicted in this series is performed under the direction of the manufacturer of the product featured. Prior to undertaking any of the demonstrated repairs on your vehicle, we suggest you consult with a certified mechanic or another professional who can adequately advise you of the proper repair or remedy required. O’Reilly Automotive Stores, Inc. and its affiliates (“O’Reilly”) disclaims any responsibility for injury or damage resulting from a viewer’s attempt to recreate the repairs shown in this series.