
Your Honda Civic's tail lights help other drivers know you are in front of them. Some tail light bulbs are multi-functional, and also serve as brake lights or turn signals to make other drivers aware of your car slowing down, stopping, or turning. Replacing failing tail light bulbs on your 2016 to 2019 Honda Civic is an easy repair that can help ensure you’re complying with state road laws and driving safely. It’s recommended that both tail light bulbs on your Honda Civic be replaced at the same time, since the bulbs have been used for the same amount of time and they are likely to fail with the same amount of use. Malfunctioning tail light bulbs can create problems with other drivers seeing your Honda Civic on the road, and could put you and others in danger. Our detailed, step-by-step instructions will help you perform tail light bulb replacement on your 2016 to 2019 Honda Civic to help you stay safe on the road while avoiding a traffic ticket.

 Safety Glasses
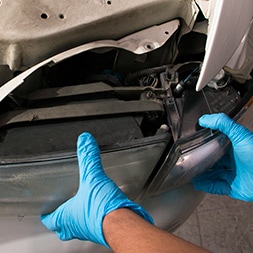
 Nitrile Gloves
 Ratchets
 Ratchets
 Tail Light Bulbs

Step 1: Remove Tail Light Assembly Bolts

Step 2: Pull Tail Light Assembly Away from Car
To remove the assembly, you’ll need to pull straight out toward the side of the car to disengage the two pegs on the back side of the assembly from the plastic grommets on the side panel.
|
Do It Right: If the assembly isn’t wanting to come off, use a trim tool to gently pry it out of the car until the pegs separate from the grommets. |

Step 3: Remove Tail Light Bulb from the Housing

Step 4: Remove Old Tail Light Bulb

Step 5: Press New Tail Light Bulb into Socket

Step 6: Install Bulb into Housing
Install it in the housing by turning it clockwise and securing it. Repeat this process for any bulbs that need to be replaced.
|
Do It Right: Before reinstalling the tail light assembly, test the bulbs to make sure they’re working. If you installed LED Bulbs that don’t appear to be working, remove the bulbs, rotate them 180°, and reinstall them. |

Step 7: Replace Tail Light Assembly

Step 8: Reinstall Tail Light Assembly Bolts
Reinstall the two bolts you removed earlier and close the trunk or hatch.
|
Do It Right: We always recommend you change bulbs in pairs, so repeat these steps for the matching bulbs on the other side. |


The automotive repair work depicted in this series is performed under the direction of the manufacturer of the product featured. Prior to undertaking any of the demonstrated repairs on your vehicle, we suggest you consult with a certified mechanic or another professional who can adequately advise you of the proper repair or remedy required. O’Reilly Automotive Stores, Inc. and its affiliates (“O’Reilly”) disclaims any responsibility for injury or damage resulting from a viewer’s attempt to recreate the repairs shown in this series.