
A starter, also known as an engine starter or starter motor, is the electric motor that turns the engine over when you start your vehicle. It uses power from the battery to engage the flywheel or flexplate, rotating the crankshaft to begin the combustion process. Once the engine is running, the starter disengages until the next start.
Because the starter works directly with the battery, a failure in this part can feel like a larger electrical issue. Understanding how the starter functions makes it easier to diagnose problems and choose the correct replacement starter from O’Reilly Auto Parts.
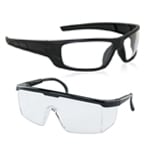 Safety Glasses
 Gloves
 Ultima Select Starter
 Ratchet Set
 Torque Wrench
 Floor Jack
 Jack Stands
 Wheel Chocks

Step 1: Prepare Your Vehicle
Park your vehicle on a level surface, set the parking brake, and turn the engine off. Open the hood and allow the engine bay to cool completely before starting your repair.

Step 2: Disconnect Your Battery
Locate the battery and disconnect the negative (-) battery cable. Position the cable so it cannot accidentally touch the battery terminal or any metal components.

Step 3: Lift and Support the Vehicle
If required for access, raise the front of the vehicle using a jack and support it securely with jack stands. Chock the rear wheels to prevent movement.

Step 4: Locate the Starter and Remove the Solenoid Cover
Locate the starter motor, which is typically mounted near where the engine and transmission meet. Remove the starter solenoid terminal cover, if equipped, to expose the electrical connections.
Disconnect the wiring by loosening the terminal nuts and carefully moving the cables aside, noting where each cable was connected to simplify installation.
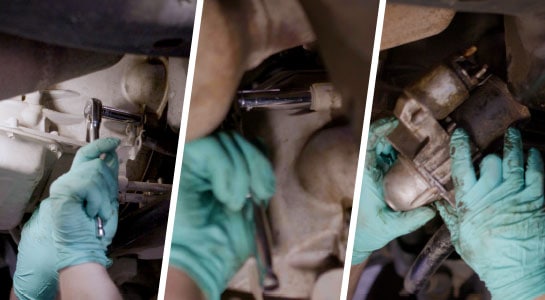
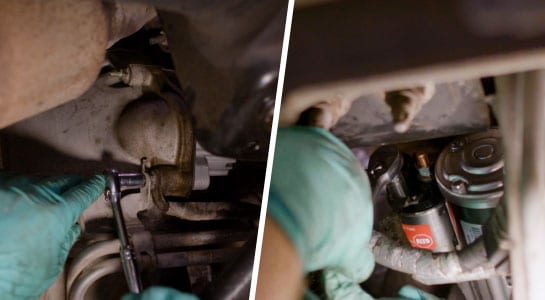
Step 5: Remove the Old Starter
Support the starter and remove the mounting bolts. Carefully lower the starter out of the mounting area. Starters can be heavier than they look, so keep a firm grip and avoid letting it drop.

Step 6: Install the New Starter
Position the new starter and hand-thread the mounting bolts to avoid cross-threading. Once aligned, tighten the bolts evenly and torque them to manufacturer specifications.
Step 7: Reinstall Starter Cables
Reconnect the starter cable and solenoid wire(s) to their correct terminals and tighten the nuts securely, ensuring they are routed away from moving or hot components. Replace the solenoid terminal cover to protect the connections.

Step 8: Reconnect the Battery and Test
Lower the vehicle, remove the wheel chocks, and reconnect the negative battery cable. Close the hood and start the engine to confirm proper starter operation.
|
Do It Right: If the engine still won’t start, inspect and clean battery terminals, ground connections, and starter wiring. O’Reilly Auto Parts offers free alternator and starter testing services that can help identify whether the starter is working as it should, or if another component may be causing the issue. |
Can you drive if your starter is failing?
A starter that works intermittently can leave you stranded without warning. Even if the engine starts sometimes, the starter may fail completely the next time you turn the key. Addressing starter issues early helps prevent unexpected no-start situations and reduces stress down the road.
How long does it usually take to replace a starter?
Replacement time varies by vehicle design and access. Many starter replacements can be completed in less than an hour with proper preparation and and room to work, though some vehicles may require more extensive disassembly or can be more difficult to service.
Do all starters look the same?
No. Starters are designed for specific engines and transmissions, and mounting points can vary by vehicle. Always match the replacement starter to your exact year, make, and model when shopping at O’Reilly Auto Parts.
Can a bad starter seem like a battery problem?
Yes. Starter issues often feel like battery problems because both can cause clicking sounds or no-start conditions. Testing the car battery and starting system together helps identify the true cause before you start your repair.


