
 Super Start Battery Terminal Protection Kit
 Safety Glasses
 Nitrile Gloves
 Shop Towels
 Ratchet & Socket
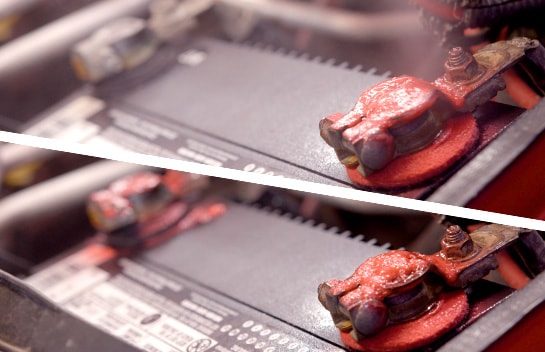
Battery corrosion is typically caused by small leaks around the battery posts that allows battery acid or hydrogen gas to come into contact with the battery terminals. This results in a chemical reaction that causes blue-green deposits to form around the battery terminal and post, forming a barrier that leads to high resistances between the battery post and terminal. Though this is most common in older batteries, it is possible for overcharging to cause hydrogen gas to escape, so it may be a good idea to check your charging system if you notice premature corrosion.
Step 1: Prepare for Cleaning a Battery Terminal
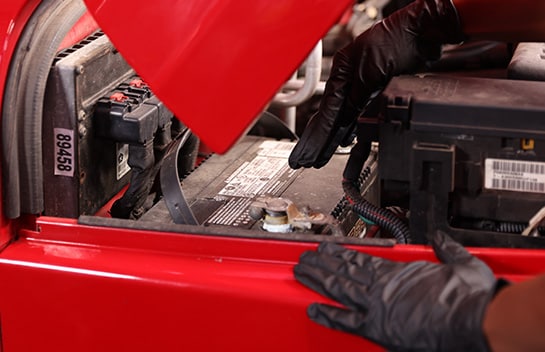
Locate your battery under the hood.
|
Do It Right: Not all batteries are located under the hood. Some batteries may be found in your trunk, under your vehicle’s floorboard, or behind your vehicle’s wheel well. Make sure to check your owners manual before continuing with this tutorial. |
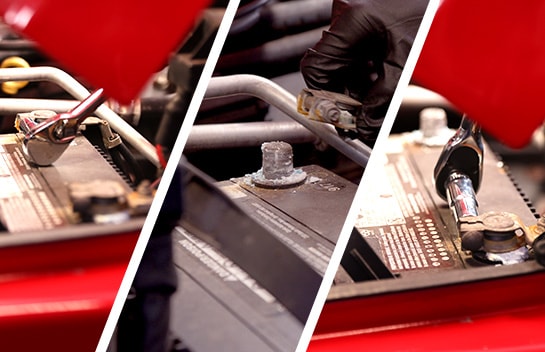
Use a small wrench or a ratchet and socket to disconnect the battery cables, starting with the negative cable. Once the negative cable is disconnected, then disconnect the positive cable.
|
Do It Right: Be careful! Make sure the black cable does not touch the red battery cable or come in contact with anything metal. |
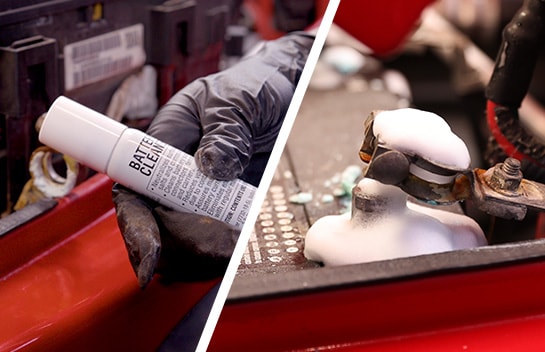
Step 2: Apply Battery Cleaner
Take your battery cleaner and shake the can before spraying lightly any areas where you see corrosion. This includes the connectors, terminals, tray, hold-down, and the surface of the battery itself.
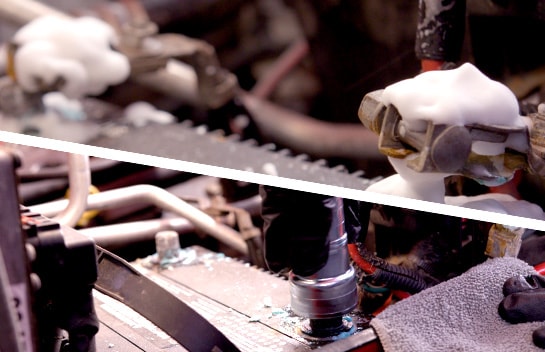
Wait a few minutes while the cleaner neutralizes surface acids, salts and corrosion. If needed, you can use a battery brush for heavy deposits on terminals and connectors. After a few minutes, flush the area with water and wipe it down with a clean, dry shop towel or rag. Repeat this process if necessary.
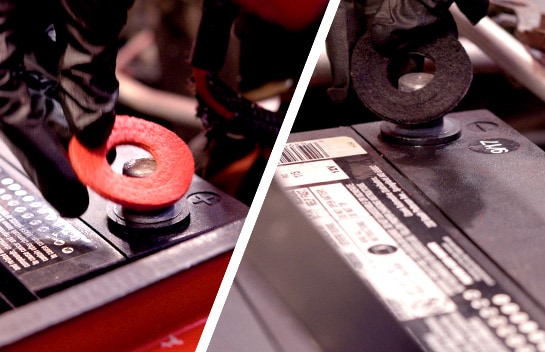
Step 3: Install Your Terminal Protectors
Once the battery terminals and the surrounding surfaces and connectors are clean and dry, install your terminal protectors. They go right over the positive and the negative posts.
These terminal protectors are infused with an anti-corrosion agent that forms a barrier to help prevent corrosion and prolong battery life.
These terminal protectors are infused with an anti-corrosion agent that forms a barrier to help prevent corrosion and prolong battery life.
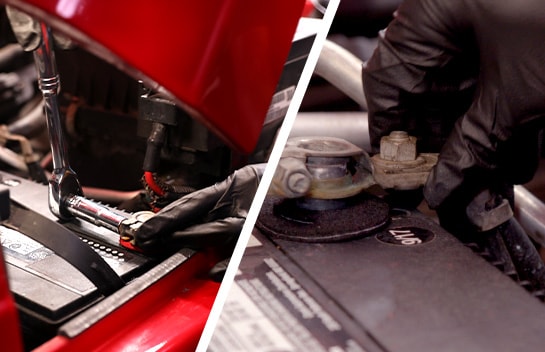
Step 4: Reconnect Your Battery Cables
Reconnect your battery cables, starting with the positive cable then the negative.
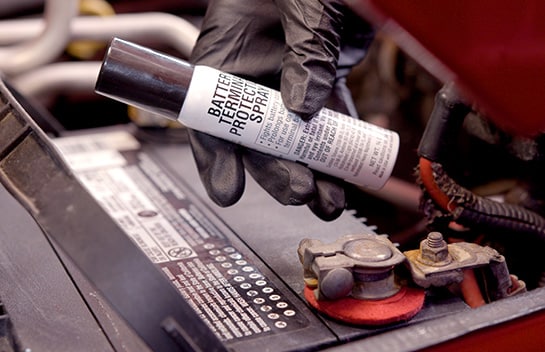
Step 5: Apply Your Terminal Protector Spray
Take your terminal protector spray and shake the can well. Hold it 10 to 12 inches from the surface and spray down the battery tray, hold-down, terminal cables and battery posts.
This spray will help increase battery life by resisting corrosion and ensuring strong terminal connections.
After applying the protector spray, close the hood of your vehicle.
After applying the protector spray, close the hood of your vehicle.


The automotive repair work depicted in this series is performed under the direction of the manufacturer of the product featured. Prior to undertaking any of the demonstrated repairs on your vehicle, we suggest you consult with a certified mechanic or another professional who can adequately advise you of the proper repair or remedy required. O’Reilly Automotive Stores, Inc. and its affiliates (“O’Reilly”) disclaims any responsibility for injury or damage resulting from a viewer’s attempt to recreate the repairs shown in this series.