Warning Sorry, you're using a web browser that is no longer supported. For the best experience please upgrade or visit the site on another browser.
Skip to content

How to Wash & Detail Your Car at Home

Washing and detailing your car at home involves five main steps: cleaning the interior, washing the exterior with the two-bucket method, clay barring, polishing, and waxing. Doing these in the right order protects your paint, prevents rust, and keeps interior surfaces from wearing out prematurely. This guide from O'Reilly Auto Parts covers each step so you can get professional-level results in your own driveway.


How to Clean Your Car’s Interior

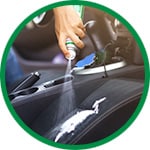
Begin by cleaning the inside of your vehicle. Remove any clutter, then vacuum, dust, and wipe down the interior surfaces. Treat any stains and use a leather-specific cleaner and conditioner if needed.

  1. Clear out any trash or loose debris from the floorboards, seats, dashboard, and console.
  2. Vacuum the floors, upholstery, and hard-to-reach areas thoroughly. Leftover dust and dirt, combined with moisture, eventually cause stains and odors.
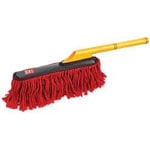
  3. Use a detailing duster or interior brush to remove dust from the dash, instrument panel, steering column, cupholders, and vents.
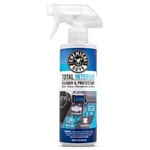
  4. Wipe down hard surfaces with an interior protectant spray or wipes.
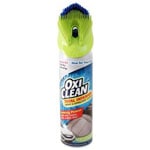
  5. Check your carpet and seats for stains, and treat them with a carpet and upholstery cleaner. If your upholstery is leather, use a cleaner and conditioner made specifically for leather. This cleans it while helping prevent drying and cracking.

What You Need to Wash Your Car at Home

Before you get the car wet, make sure you have the proper supplies. The wrong soap or cloth can strip wax, scratch your paint, or leave streaks instead of a clean finish.

Choosing the Best Car Wash Soap

Car wash soap is formulated specifically for painted surfaces, unlike household dish soap, which can strip wax and even cause scratching or finish damage. Wax- and silicone-free soap is the better choice if you plan to wax your car afterward, since some matte-finish surfaces don't react well to soaps containing wax or silicone. Soaps that contain wax work well for between-wax washes, as they help restore some of the protection that's worn off between your full waxes.

Pro Tip: Never use household dish soap on your car. It's designed to strip grease, which can also strip wax and leave your paint more vulnerable to scratching.

Wash Mitts, Cloths, and a Chamois

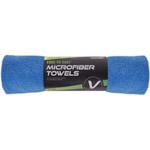
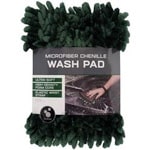
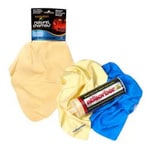
A wash mitt or cloth designed for automotive use has soft fibers that won't cause scratches or swirls the way a rougher household towel can. Be sure to keep it clean as you work. Trapped debris in the mitt is one of the most common causes of tiny scratches in paint. For drying, a chamois ("shammy") or a microfiber drying towel removes water without leaving it to air-dry, which is what causes water spots in the first place.


How to Clean Your Tires & Wheels

Tire shine and wheel cleaner can help make your car look its best.

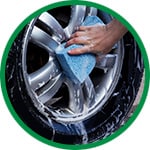
Wheels and tires are generally the dirtiest part of your vehicle. Cleaning them first ensures any overspray or dirt gets rinsed off as you continue washing the rest of the car.

  1. Find a shaded spot to work in. Direct sun dries soap and water too quickly, leading to water spots and deposits.
  2. Spray down the wheels, tires, wheel wells, and undercarriage first to knock loose as much dirt as possible.
  3. Apply a tire and wheel cleaner. Many wheel cleaning products are designed to be sprayed directly onto the wheel or tire and rinsed off after a few minutes.
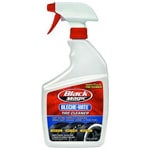
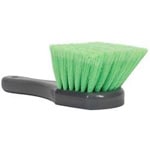
  4. If needed, use a tire cleaner and a tire & wheel brush to scrub and rinse the tires.
  5. If you're not washing the rest of the car right away, dry the wheels and tires with a microfiber cloth to prevent water spots.
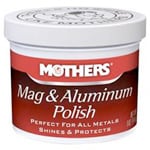
  6. Chrome or aluminum polish and wheel coatings are optional next steps if you want extra shine or protection against brake dust and oxidation.

How to Wash Your Car Using the Two-Bucket Method

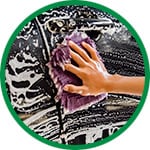
The two-bucket method keeps dirt you've already washed off your car from ending up back on the paint. One bucket holds soapy water, while the other holds clean water for rinsing your wash mitt.

  1. Rinse the entire car from the top down, including panel gaps, door sills, and around trim and lighting. Keep the car wet as you go so water spots don't form on the paint.
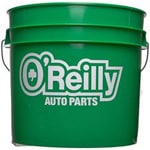
  2. Set up two car wash buckets: one with car wash soap mixed to the label's directions, one with clean water.
  3. Working one panel at a time from the roof down (and generally front to back, since rear panels tend to be dirtiest), dip your mitt in the soap bucket and wash the panel.
  4. Rinse your mitt in the clean-water bucket after every panel to remove trapped debris before it scratches the next section. If the water in that bucket gets visibly dirty, swap it out.
  5. Use a separate mitt for the wheel wells and lower body panels, since they collect the most dirt and grime. If soap doesn’t remove everything, try a bug and tar remover.
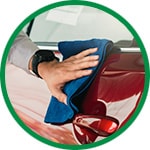
  6. Rinse the car one more time, then dry it using a chamois or microfiber towel with light pressure, wringing it out frequently to avoid streaking.

Pro Tip: Rinse your mitt in the clean-water bucket after every panel. Skipping this step is one of the most common causes of tiny scratches and swirls on your vehicle.


How to Dry Your Car & Prevent Water Spots

Water spots on the hood of a car can contain minerals and dry to a film.

Water spots are mineral deposits left behind when water evaporates from your car’s surface. They’re more than just a cosmetic issue; if left too long, those minerals can etch the paint. Here are a few ways to help reduce water spots:

  1. Dry the car completely with a chamois or microfiber towel right after washing, rather than letting it air-dry. Work in sections and wring the towel out often so you're not just spreading water around.
  2. Work in a shaded spot or in a garage, out of direct sunlight, so the water doesn't dry before you can wipe it down.
  3. Rinse the car with free-flowing water rather than a spray nozzle, where possible, since it removes more mineral deposits from the surface.

Pro Tip: Waxing your vehicle is one of the best ways to help water bead and make it easier to wipe water droplets off the surface.

How to Use a Clay Bar on Your Vehicle

A clay bar is a piece of soft synthetic resin, about the size of a bar of soap, that you glide across your paint with a lubricant spray. Even after washing your car, contaminants like brake dust, road grit, pollution residue, and water-spot minerals can remain embedded in the clear coat.

If these contaminants aren’t removed before polishing or waxing, they can scratch the finish during buffing or break free, leaving pits in the wax layer. Unlike washing, which only lifts loose surface dirt, a clay bar physically removes contaminants bonded to the clear coat.

  1. Work in a 2x2-foot section at a time. Spray clay bar lubricant or a detailer spray over the area. This keeps the clay from sticking or scratching the paint.
  2. Knead a piece of clay bar into a flat oval that covers your fingertips, keeping the rest wrapped to keep it from drying out.
  3. Spray lubricant on the clay itself, then glide it across the surface with minimal pressure, re-spraying any dry spots as you go.
  4. If the clay picks up visible dirt, fold it to expose a clean surface before continuing.
  5. Recheck the panel with the plastic bag. If it still feels rough, repeat until it's smooth, then move to the next section.

Pro Tip: Slide a smooth plastic bag over your hand and run your fingertips across a clean, dry panel. If you feel friction, bumps, or rough spots, that panel needs to be clay-barred.


How To Buff & Polish Your Car

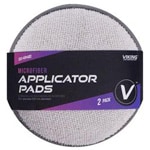
Use an applicator pad to properly polish and remove scratches and swirls from automotive finishes.

Polishing a car isn’t something most people do at home, since heavy correction work is much easier with an orbital or rotary polisher. However, hand polishing is effective for minor scratches and swirls and can restore your vehicle’s high-gloss finish.

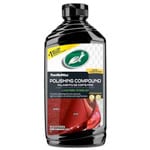
Polishing compounds are abrasive and come in hard, intermediate, and soft grades. Because it’s difficult to judge paint hardness at home, start with the least abrasive compound and only use a stronger one if you’re not getting the results you want.

  1. Work a small amount of polish (about a tablespoon) into a foam or microfiber applicator pad.
  2. Spread your fingers flat across the pad rather than pressing with your fingertips, and work the product into the paint in small sections using a circular motion.
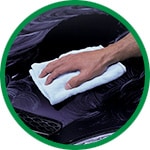
  3. Once a thin film forms on the panel, buff it off with a microfiber towel before it dries to a haze.
  4. Move to the next section and repeat. Once every panel is polished, you're ready to wax.

Pro Tip: Have questions about polishing compounds? Visit your local O’Reilly Auto Parts store, and a parts professional will be happy to help you.

How to Wax Your Car at Home

Waxing is typically the last step when washing and detailing your car at home. It can help protect the freshly polished surface of the vehicle against debris, contaminants, and UV rays. Regular waxing also cuts down on how often you need to polish your vehicle.

Different Types of Car Wax


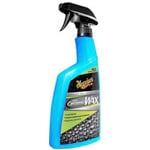
Spray Wax

The major benefit of spray wax is that it can be applied very easily, though its results may not last as long as other, more labor-intensive wax products. Spray wax can be applied to each panel or section of the car and worked in by hand with a damp microfiber cloth. Once the product has been worked into the panel, simply flip the microfiber towel over and buff.

Liquid Wax

Liquid wax takes more effort than spray wax but tends to last longer. Apply the thinnest coat possible to one panel at a time using a damp foam applicator pad, working in circles, then buff the haze off with a microfiber towel before it sits too long, since leaving wax on for longer periods makes it harder to remove.

Paste Wax

Paste wax is considerably more labor-intensive to apply than both spray and liquid waxes, but the results often last longer and offer better protection and appearance between details. Paste wax is applied the same way as liquid wax, in a thin coat with a foam applicator pad. Be sure to check every angle for leftover residue so you don't end up with a hazy panel.


Pro Tip: If you're short on time or your car's already fairly clean, a one-step cleaner wax gives you a quick shine without the full process. Keeping a spray detailer and a clean microfiber towel in the car also makes it easy to touch up the shine between full washes.


How to Apply Tire Shine

Tire shine also called tire dressing, is often the last step for a finished look. It comes in solvent-based and water-based formulas: water-based is generally gentler and safer across more wheel and tire types, but check what's recommended for your specific wheels.

  1. Read the product instructions before applying and wear disposable gloves when using solvent-based formulas.
  2. Depending on the product, spray it on and let it dry, or apply it to the sidewall with an applicator.
  3. Let the tire shine sit for the time listed on the label, then wipe off any excess with a clean cloth or sponge to keep it from attracting dirt and brake dust.

Pro Tip: Never apply tire shine to the tread. It creates a slick spot that can affect traction and handling.


How to Clean Your Windows, Windshield, & Headlights

Dirt and grime on your windows or windshield, or haze on your headlights, can make it harder to see the road and for others to see you. Keeping them clean helps keep you safer behind the wheel.

Car Windshield and Window Cleaning Tips

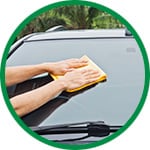
Clean the glass inside and out with a cleaner made specifically for automotive use. General glass cleaners often contain ammonia, which can damage window tint and nearby paint. Our windshield cleaning guide covers the wipe pattern that prevents streaking and why ammonia-free cleaner matters if your windows are tinted.

Car Headlight Restoration Tips

Cloudy, hazed headlights are usually caused by UV exposure and weathering, not dirt, so washing alone typically won't clear them. A headlight restoration kit removes the oxidation and restores clarity. See our headlight restoration guide for the full process.

Frequently Asked Questions

How long does it take to wash and detail a car at home?

A full wash and detail, including interior cleaning, clay bar, polish, and wax, typically takes 3 to 5 hours for an average-sized car. A wash alone (no clay bar, polish, or wax) usually takes 30 to 45 minutes. Polishing is usually the step that takes the most time when it’s done by hand, especially if you have light scratches on your exterior.

In what order should you wash and detail a car?

When washing your car at home, clean the interior first, then the wheels and tires, and finally the exterior using the two-bucket method. Once the car is dry, use a clay bar to lift embedded contaminants, polish out any scratches or swirls, then wax to protect the finish. Tire shine and glass cleaning are typically saved for last.

Can I use dish soap to wash my car?

You should never use dish soap to wash your car. Dish soap is designed to strip grease and oil, which means it can also strip wax and, in some cases, leave the paint more vulnerable to scratching. Most dish soaps often don’t offer the level of lubrication that car wash soap does, and can dry out rubber trim or weatherstripping if used frequently. Car wash soap is formulated to clean without damaging the finish.

What's the difference between polishing and waxing a car?

Polishing uses a mild abrasive to smooth out light scratches, swirls, and oxidation in the clear coat, so it should only be done when the paint actually needs it. Waxing doesn't correct any imperfections. It adds a protective layer that shields the paint from UV rays and contaminants, and it's meant to be reapplied regularly. In other words, use car polish first to fix the surface, and apply wax to protect it.


Get a Professional Wash & Detail with O'Reilly Auto Parts

From the first wipe-down of the interior to the final coat of wax, every product in this guide is available at O'Reilly Auto Parts. Shop car wash and detailing supplies online at OReillyAuto.com or at your local O'Reilly Auto Parts store, and get everything you need to keep your car looking its best, backed by our Professional Parts People.