
Window tinting protects your vehicle's interior from the harmful effects of UV rays, which can cause the upholstery, dashboard, and other components to fade or crack over time. Additionally, window tinting helps keep your car's interior cooler by reducing the amount of heat that enters through the windows, helping your air conditioner cool the cabin more quickly.

20% OFF $125+ WITH PROMO CODE: GREEN20, Online Only
Get 20% off $125 with promo code GREEN20. Online, ship to home only. 04/23/26 – 04/27/26. *Maximum discount $50.
20% off $125+: Valid on regularly priced in-stock items for Ship to Home orders that when purchased together total $125 or more (before tax, shipping and discount) on the website only. Excludes AIRAID, B&M, Bully Dog, DeVilbiss, Edelbrock, Flowmaster, Holley, Hurst, Ingersoll-Rand, K&N, MSD, SCT, and Spectre items.
To Redeem Offer: Add qualifying items totaling $125 or more to your shopping cart and select “Ship” as your delivery method. Enter promo code GREEN20 in the cart. The total in your shopping cart will be adjusted after promo code is applied. Excluded brands contribute toward minimum purchase amount to qualify for offer but are not eligible for discount. (Maximum $50.00 Discount.) Valid Thursday, April 23rd to Monday, April 27th, 2026 (11:59pm Hawaii Time Zone). Coupon code is not redeemable for cash, is nontransferable and cannot be replaced if lost or stolen. Not valid on same-day delivery orders. Void if copied, transferred or where prohibited by law. Customer pays sales tax and shipping fees.
Offer subject to adjustment due to returns, cancellations and exchanges. Additional taxes and duties may apply. Not valid with any other promotional gift with purchase. Offer may be modified or discontinued at any time without notice.
Offer Terms: Offer does not apply to gift card orders. Offer does not apply to Lead-Acid batteries. Cannot be used in combination with any other certificates, offers, or discounts or for payment on account. Not valid on previous purchases or store purchases. Shipping & handling and taxes do not qualify towards the minimum purchase. Valid for retail customers only. OReillyAuto.com only ships orders within the U.S.
Excluded Brands: Offer does not apply to AIRAID, B&M, Bully Dog, DeVilbiss, Edelbrock, Flowmaster, Holley, Hurst, Ingersoll-Rand, K&N, MSD, SCT, and Spectre items.
 Safety Glasses
 Nitrile Gloves
 Gila Window Film
 Gila Window Film Application Kit
 Transparent Tape
 Razor
Razor
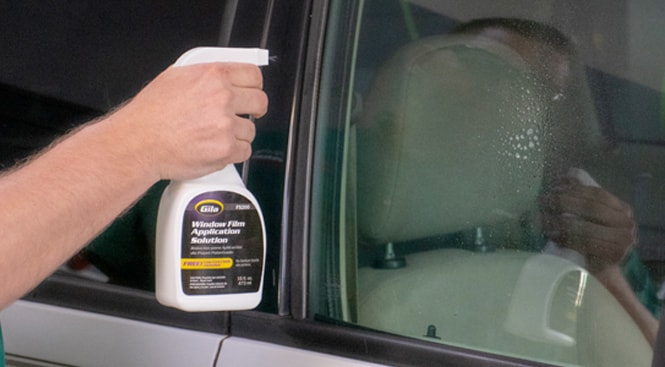
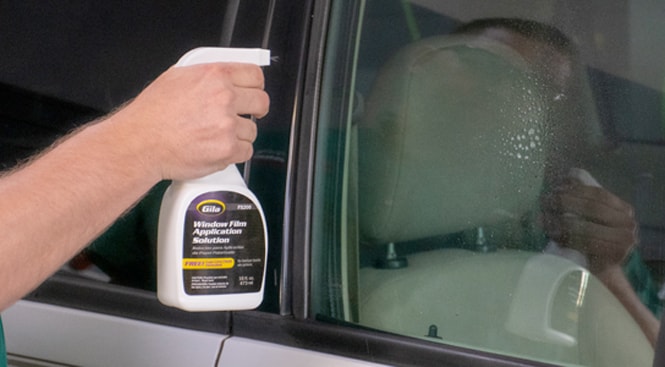
Step 1: Clean Your Windows Thoroughly
You’ll begin by using the outside of the window as a pattern for the film, so the window needs to be very clean. Liberally spray the exterior window glass with the Gila Application Solution.
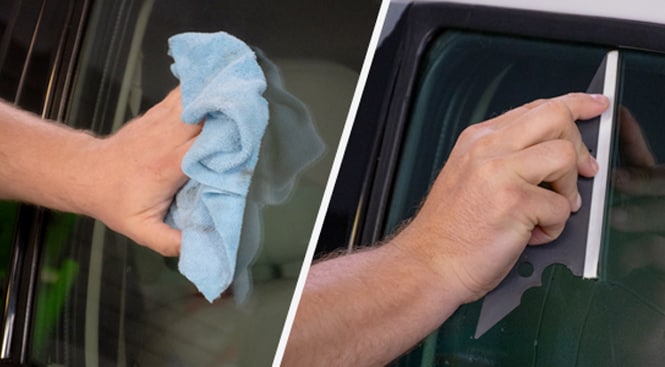
Step 2: Dry Your Window Glass
After spraying Gila Application Solution on your window exterior, use a low-lint cloth or squeegee to dry the glass.
Step 3: Identify The Liner Side Of Your Window Tint
We will be using Gila Window Film, which has a liner side designed to protect the adhesive. It is important to identify the side with the liner: The liner side is rolled to the outside and is slick to the touch. If you rub the tint against itself, the sticky side is the tint and the slick side is the liner.
Step 4: Spray The Exterior Side Of The Window With Application Solution
Spray and wet the outside of the window with the Gila Window Film Application Solution
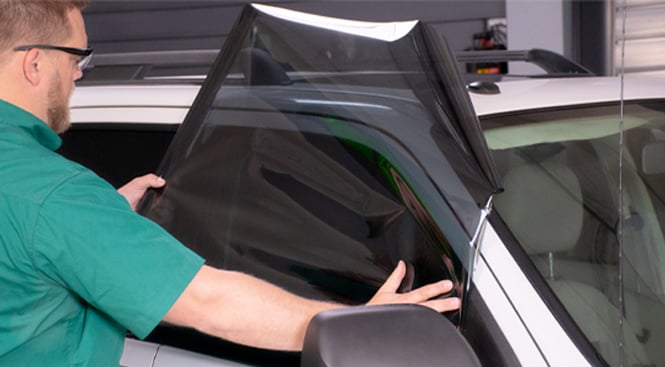
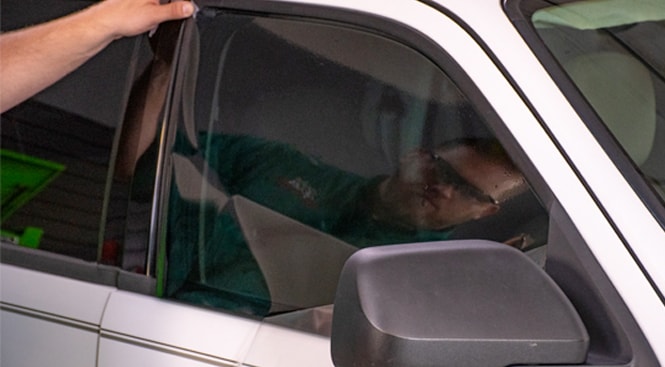
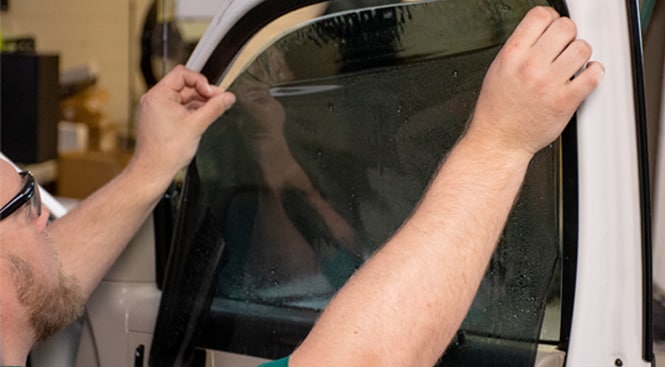
Step 5: Use The Outside Of The Window As A Pattern For Film Tint
With the liner side facing out, carefully roll the film onto the exterior side of your vehicle’s window. Remember, we will be applying window tint to the interior side of the window, not the exterior. This step helps you easier map out and position the tint for installation.
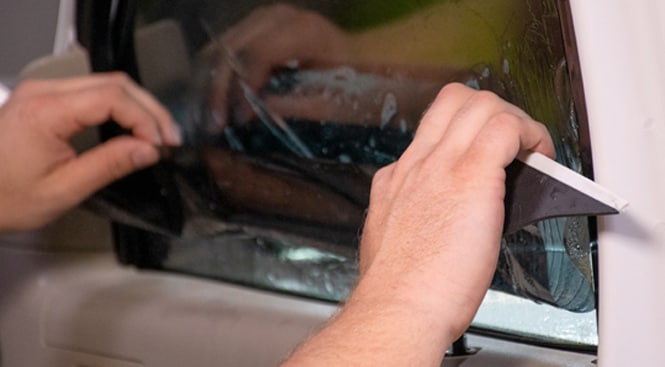
Step 6: Temporarily Position The Tint For Trimming
Using the soft, rubber side of a squeegee, gently press down on the film to temporarily hold it in place for trimming.
Step 7: Cut to Fit Your Windows
Using a razor blade, trim away excess film and set the remaining roll to the side.
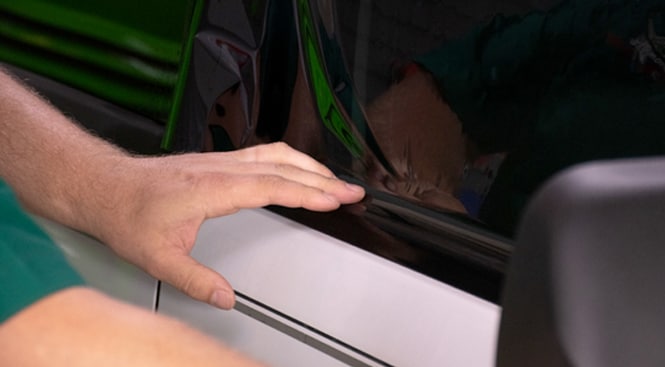
Step 8: Place Film Just Below the Tint Line
Position the film ¼” to ½” below the top of the inside gasket. Then, using the Gila Tint Application Spray, wet the outside of the film.
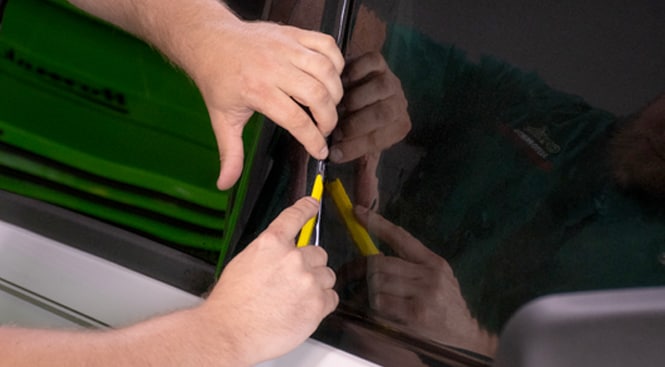
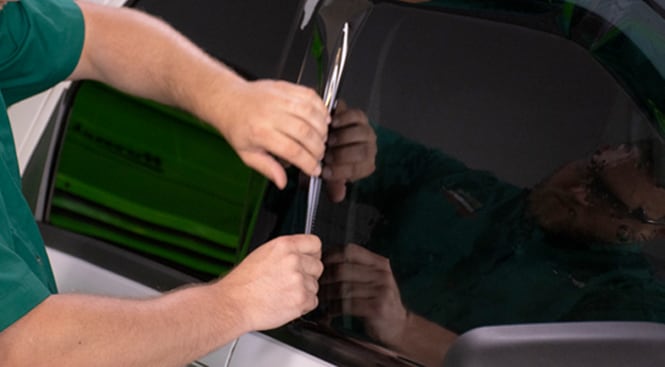
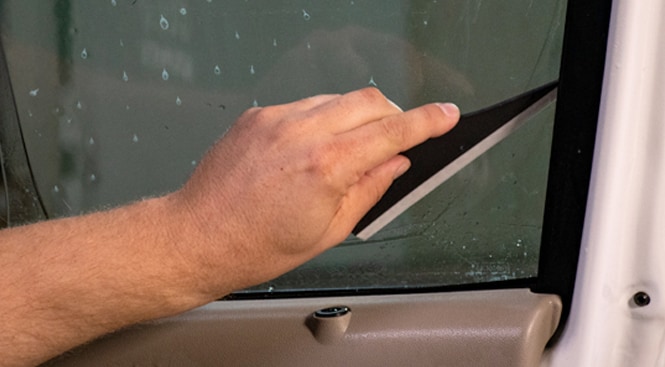
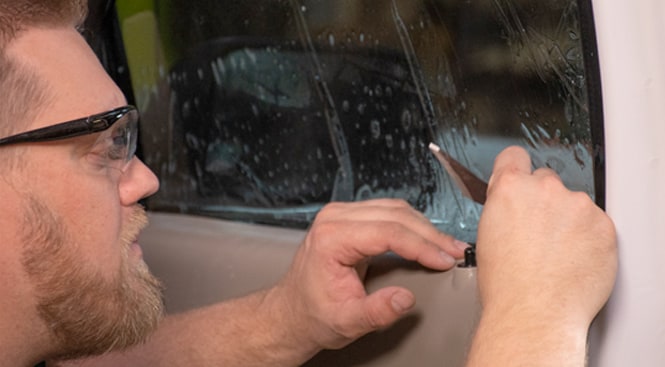
Step 9: Cut The Window Tint Film
With a sharp blade, trim along the window seals of the vertical edges first. To avoid damage to the glass or seals when trimming, press on the knife gently while keeping a low angle. Use only enough force to cut through the film and always tear excess film away from the cut.
|
Do It Right: Before trimming the top edge, gently lift the film from the bottom of the glass so the film does not crease when the window is rolled down. |
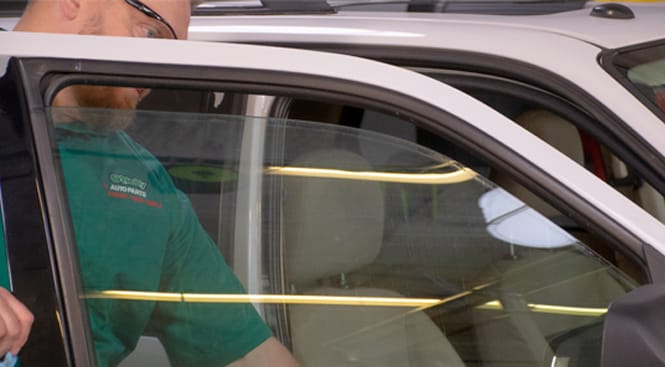
Step 10: Open The Door And Roll The Window Down Slightly
Open the door and roll the window down about 2 inches. The top of the glass should now be exposed.
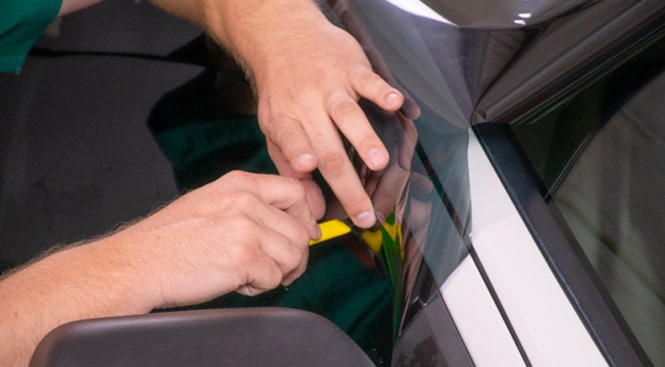
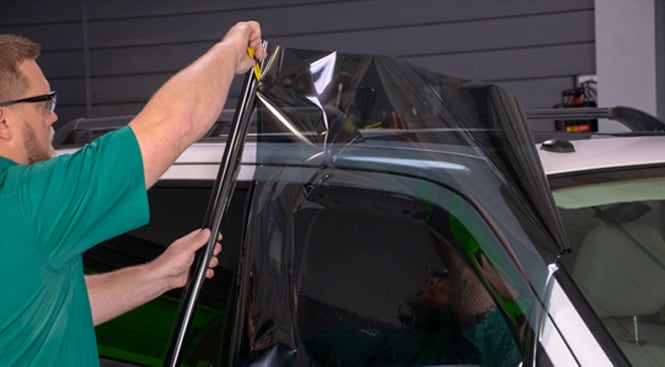
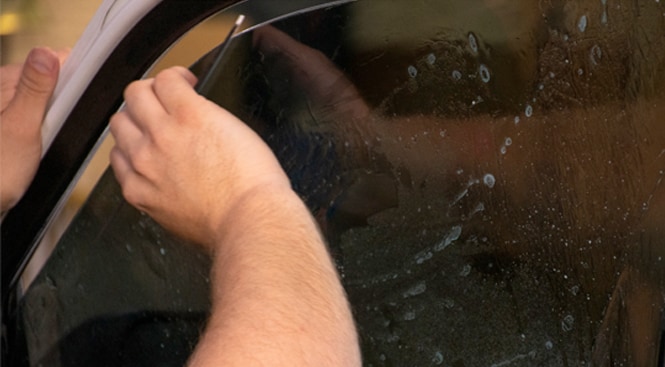
Step 11: Carefully Trim Film To Fit The Glass’ Edge
Using the top of the glass as your blade’s guide, trim the film to the edge of the glass. Be sure to take your time and make a clean cut. Reposition the film slightly and carefully round out any corners that aren’t smooth. The film is now cut to fit.
Step 12: Spray & Clean The Interior Side Of The Window
Using the Gila Applicator Spray, wet the inside of the window and thoroughly clean the glass with a low-lint cloth and squeegee. Use a razor or plastic scrub pad for any stubborn spots, since any dirt left behind will cause bubbles in the film. Be sure to wipe down all seals where dirt may be trapped.
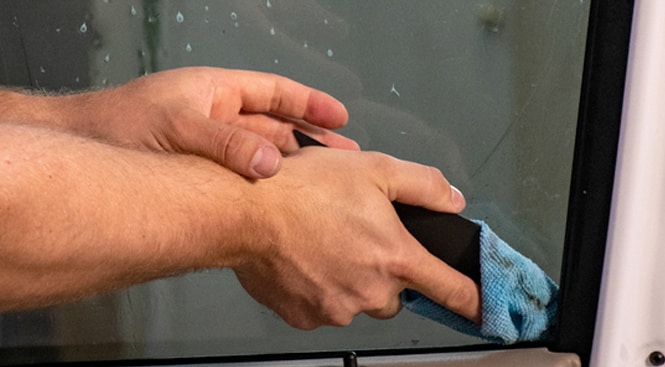
Step 13: Dry The Interior Window
Wrap the hard edge of the squeegee with the low-lint cloth and clean between the glass and the gasket thoroughly.
|
Do It Right: Lightly spray the glass and wipe with the squeegee to remove any lint left behind. |
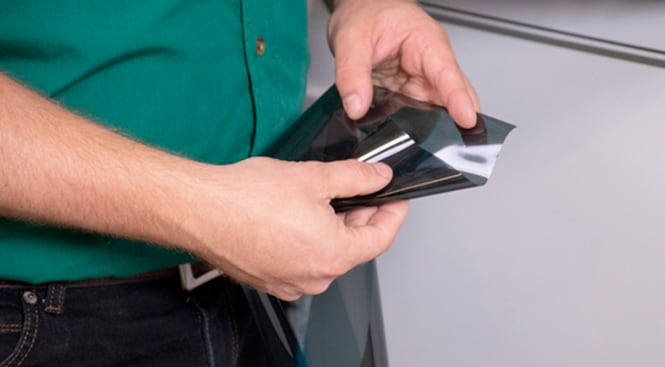
Step 14: Remove Liner from the Film
To easily separate the clear liner, leave the film on the outside glass and use two pieces of transparent tape, placing one on each side of a corner with half of the tape on the film and the other half extending over the corner edge. Grip the two pieces of tape and press firmly at the film’s edge. Then, quickly pull them apart to expose the adhesive.
|
Do It Right: While gently removing the liner, generously spray the newly exposed adhesive with the Gila Application Solution. This reduces static electricity and the possibility of dirt contamination. |
Step 15: Spray Interior Glass with Application Solution
Spray the inside of the glass generously. Make sure the window is down 2 inches, and carefully lift the film from the outside of the glass. Then, apply the wet adhesive against the inside glass. With the glass and film wet, the film will slide into position more easily.
|
Do It Right: Before positioning the film, fold up the bottom edge so that the adhesive does not touch the door panel and pick up any dirt. |
Step 16: Slide the Film into Place
Leaving about an 1/8’” gap at the top edge of the window, slide the film into place.

Step 17: Install Tint to Your Interior Window
Spray the film again with the Application Solution. Using the soft edge of the squeegee, press the top of the film firmly to the glass removing all water from under the film. Press the film behind the seals and roll the window up.
Step 18: Wet the Window Again to Continue Installation
To ensure the bottom of the glass is clean, respray and squeegee the window. Wet the window again, then unfold the film onto the glass. Slip the bottom of the film under the gasket.
Step 19: Slide Film Between The Gasket and Window
Using the hard edge of the squeegee, pull back the gasket so that the film will slide easily behind it. Be careful not to crease the film.
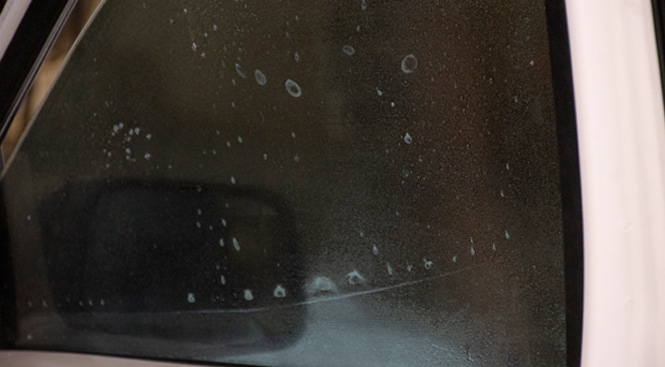
Step 20: Remove Water or Bubbles Beneath the Film
Once the film is tucked under the gasket, squeegee firmly downward and left to right until all water is pushed out from under the film. Push any bubbles to the nearest edge. To finish, wrap a dry low-lint cloth around the hard edge of the squeegee and firmly press toward the edges. The cloth will absorb any excess solution and keep it from creeping back under the film. Wipe up any solution that may be left on the upholstery and start the next window.
|
Do It Right: Something to be aware of is that rear windows, especially on passenger cars, are often curved from both side to side and top to bottom. Rear window film installation requires shrinking the film (often by a heat gun) to fit, or applying multiple thin strips. To make this easier, view our video on how to install rear window tint. |


The automotive repair work depicted in this series is performed under the direction of the manufacturer of the product featured. Prior to undertaking any of the demonstrated repairs on your vehicle, we suggest you consult with a certified mechanic or another professional who can adequately advise you of the proper repair or remedy required. O’Reilly Automotive Stores, Inc. and its affiliates (“O’Reilly”) disclaims any responsibility for injury or damage resulting from a viewer’s attempt to recreate the repairs shown in this series.