
 Safety glasses
 Nitrile Gloves
 Headlight Bulb
Park on a level surface and open the hood. In order to access the bulbs on the driver’s side, you’ll need to remove the battery. Beyond that, this procedure is largely the same on both sides of the vehicle. We’ll quickly show you how to remove the battery, as well as how to replace the bulb on the passenger side.

Step 1: Prepare Your Honda Accord

Step 2: Disconnect Your Battery
Start by using your 10mm deep socket or wrench to loosen the negative battery cable then lift it off and set it aside. Repeat this step for the positive battery terminal.

Step 3: Remove Your Battery
Use the same socket or wrench to loosen the nuts on the battery hold-down. Remove the hold-down by slipping the hooks out of their holes on both sides of the battery tray. Now you should be able to lift the battery out.

Step 4: Locate Your Headlight Bulbs
Once the battery is out, you’ll be able to see the back of the headlight bulbs in the housing. The inside bulb is the high beam and the outside bulb is the low beam.
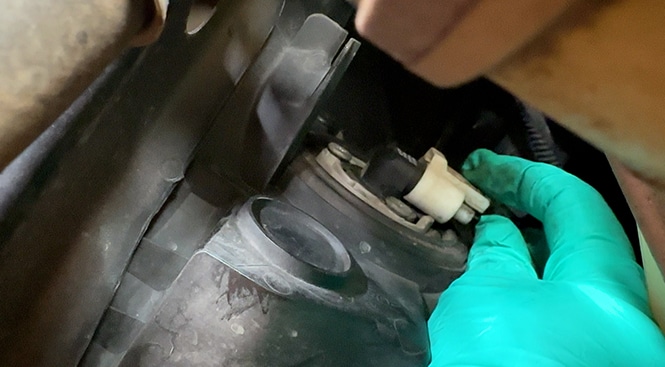
Step 5: Disconnect the Bulb
Press in on the tab at the back of the bulb you need to change and slip the wiring harness off of the bulb. With the wiring harness detached, turn the bulb slightly counterclockwise to release it and carefully lift it out.
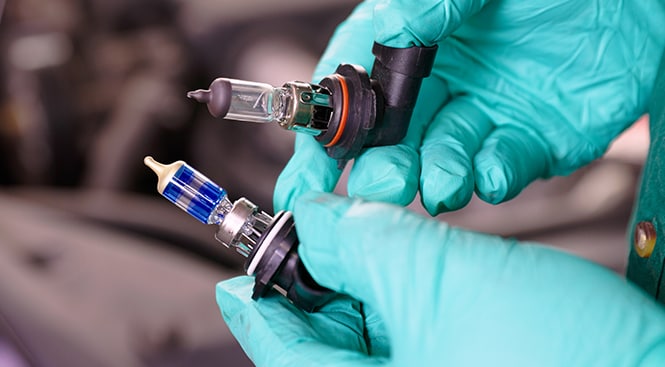
Step 6: Compare Bulbs
Compare the new bulb's connector and design to your old one to make sure you have the right replacement.
|
Do It Right: Be sure not to touch your new headlight bulb with your bare fingers. Finger oils or grease can create hot spots on the glass that may cause the bulb to burn out prematurely. |

Step 7: Install Your New Bulb
Install your new bulb carefully into the back of the housing aligning the tabs on the bulb with the notches on the back of the assembly. Once the tabs are inserted, turn the bulb clockwise to secure it.

Step 8: Replace Your Battery
Reconnect the wiring harness connector to the base of the bulb by applying pressure until you hear it click into place. Repeat these steps for the other side if needed.
If you’ve finished replacing the bulbs on the driver side, set your battery back in its tray and use your socket or wrench to secure the positive battery cable first.
If you’ve finished replacing the bulbs on the driver side, set your battery back in its tray and use your socket or wrench to secure the positive battery cable first.
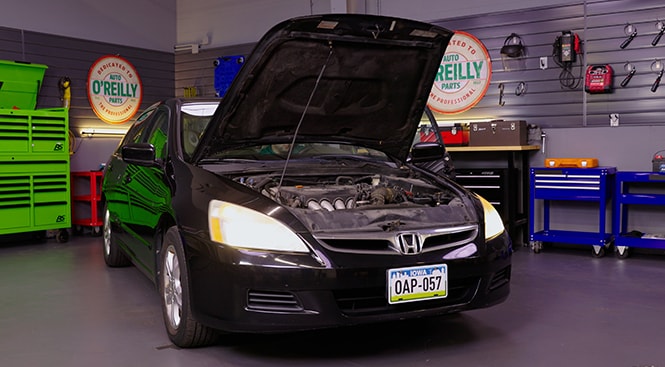
Step 9: Check Your New Bulbs
Reattach your negative battery cable and turn on your headlights to make sure your new bulb is working.

If everything looks good, reinstall your battery hold-down, making sure the hooks at the bottom of the rods slip into the holes on the battery tray before tightening the nuts. Close the hood. If your battery cables were detached, your factory stereo settings and clock will likely need to be reset. Follow the link on the screen if you need details on that procedure


Our detailed instructions and video demonstrate the headlight bulb replacement procedures for a 2006 Honda Accord LX. Repair steps will be similar on 2003, 2004, 2005, and 2007 Honda Accord models. If you notice that your Accord’s headlights are dim, flickering, functioning poorly, or completely burned out, be sure to address this simple repair task promptly. Ensuring that your Accord abides by road laws and remains visible to others on the road is crucial to your and others’ safety. Find the replacement headlight bulbs, headlight assembly, tail light and turn signal bulbs, and more designed to fit your 2003 to 2007 Honda Accord at O’Reilly Auto Parts.
The automotive repair work depicted in this series is performed under the direction of the manufacturer of the product featured. Prior to undertaking any of the demonstrated repairs on your vehicle, we suggest you consult with a certified mechanic or another professional who can adequately advise you of the proper repair or remedy required. O’Reilly Automotive Stores, Inc. and its affiliates (“O’Reilly”) disclaims any responsibility for injury or damage resulting from a viewer’s attempt to recreate the repairs shown in this series.